How to Use an ASTM D5264 Sutherland Rub Tester?
Printed packaging can look flawless before testing, then show a pale scuff after only a few controlled strokes. That small mark can affect shelf appeal, barcode readability, and brand confidence. An ASTM D5264 Sutherland Rub Tester helps convert that visual risk into a repeatable laboratory observation.
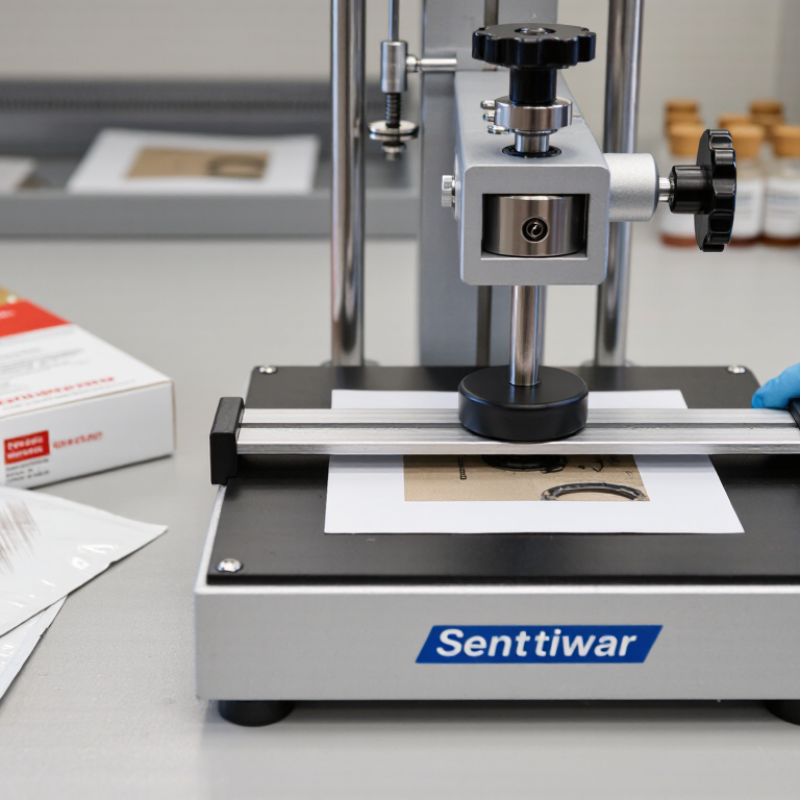
ASTM D5264 evaluates the abrasion resistance of printed materials through controlled rubbing, pressure, and stroke cycles. Operators typically condition the specimen, record its substrate and coating, secure it carefully, and select an appropriate load. The tester then moves a weighted rubbing surface across the print. Inspect the result under consistent lighting. Do not rely on memory.
Walter Soroka, a recognized packaging technology authority, defines packaging as “the science, art, and technology of enclosing and protecting products.” That principle explains why rub testing matters beyond appearance. Packaging must survive handling, transport, stacking, and retail display. Reports from Smithers, including The Future of Global Packaging to 2028, and PMMI studies on packaging operations, continue to emphasize performance, automation, and measurable quality control across modern packaging lines. These reports do not replace ASTM testing, but they show why standardized evidence is increasingly valuable.
This guide explains how to use an ASTM D5264 Sutherland Rub Tester, from specimen preparation to result interpretation. Small details matter. Uneven clamping can distort outcomes. Excessive pressure can exaggerate damage. Poor lighting can hide faint scuffing.
The method is reliable, not magical. Results still depend on ink, varnish, substrate, humidity, and operator discipline. Record those variables. Recheck questionable failures. A careful test report is often more useful than a dramatic photograph.
Understanding What the ASTM D5264 Sutherland Rub Tester Measures
Understanding What the ASTM D5264 Sutherland Rub Tester Measures
An ASTM D5264 Sutherland rub tester evaluates how well printed surfaces withstand controlled rubbing. It does not measure general product durability. Instead, it examines visible damage after repeated contact, pressure, and movement.
Typical observations include ink scuffing, coating transfer, color loss, surface disruption, and substrate exposure.
The test uses a standardized rubbing motion and controlled load. Technicians compare the tested area with an untested reference area. They may also record color difference, gloss change, or coating weight loss when suitable instruments are available.
This matters during packaging handling, stacking, transport, and retail display. The Future of Global Packaging to 2028, published by Smithers, values the global packaging market at more than 1 trillion U.S. dollars, showing the scale of potential quality failures. Even a small printed defect can affect shelf appearance and customer perception.
In practice, I would inspect the print before testing, because weak adhesion may already exist. Clean the rubbing head carefully. Dust can distort results. Select the load and stroke number according to the material and laboratory procedure.
Do not treat one pass or one visual score as absolute proof. The method is useful, but not magical. Different inks, coatings, papers, and drying conditions can produce different results.
ASTM D5264 results should therefore support process decisions, not replace production judgment.
A repeat test may reveal an uncomfortable inconsistency. That inconsistency deserves investigation.
Preparing the Tester, Materials, and Test Specimens
How to Use an ASTM D5264 Sutherland Rub Tester?
Preparing the Tester, Materials, and Test Specimens
Before testing, place the rub tester on a rigid, level bench. Remove dust from the platform, carriage, and weight assembly. Check that the carriage moves smoothly without side-to-side play. Confirm the specified load, stroke length, and cycle count in the current ASTM D5264 procedure. Do not rely on a previous operator’s settings. Small changes can affect the result.
Condition the printed materials in a controlled laboratory atmosphere before cutting specimens. Record temperature, humidity, substrate type, ink system, coating, and curing time. Use clean, sharp tools to cut specimens with consistent dimensions. Mark the print direction and test face lightly on the reverse side. Handle the printed area by its edges. Finger oils can create misleading scuff marks.
Prepare the required rub material and inspect it for wrinkles, dirt, glazing, or previous wear. Replace it when the procedure requires fresh material. Secure it evenly around the rubbing surface, without folds or loose edges. Place each specimen flat and align it with the rubbing path. A crooked specimen may produce uneven contact. That error is easy to miss.
Run a brief mechanical check without a specimen. Listen for unusual noise and watch for interrupted motion. Include control samples when practical, especially after maintenance or setup changes. If results look inconsistent, pause and inspect alignment before blaming the print. Even careful preparation cannot remove every source of variation. Record anything unusual while the details are still clear.
Setting the Load, Stroke, and Number of Rubbing Cycles
How to Use an ASTM D5264 Sutherland Rub Tester?
Setting the Load, Stroke, and Number of Rubbing Cycles
Begin with a clean, conditioned specimen and a clean rubbing material. Dust can change the result. Secure the specimen flat, without wrinkles or excessive tension. Before testing, inspect the instrument, verify the counter, and confirm that the rubbing head moves smoothly. I usually run one empty stroke. It often reveals loose fibers or unusual resistance.
Set the load according to the applicable ASTM D5264 procedure or your approved laboratory method. Do not guess from a previous job. A small load difference can change ink transfer, coating wear, or surface gloss. Confirm the weight is seated correctly and record its value. Set the stroke to the instrument’s specified travel distance. Check that the head reaches both ends without striking the frame. The stroke must remain consistent throughout the test.
Enter the required number of rubbing cycles before starting. Use fewer cycles for early failure checks and the specified count for formal comparisons. Watch the first several movements. The specimen should not shift, and the counter should advance once per complete cycle. Stop the test if the rubbing material folds or the sample moves. That result may be invalid. I sometimes find that an apparently minor alignment error explains a surprising mark. Record the load, stroke, cycles, specimen condition, and visible changes immediately after testing. Photographs help, but they do not replace written observations.
Running the ASTM D5264 Rub Test Step by Step
How to Use an ASTM D5264 Sutherland Rub Tester?
Running the ASTM D5264 Rub Test Step by Step
Begin by conditioning the printed samples in a controlled laboratory environment. Record temperature, humidity, substrate, ink, coating, and curing time. Small details matter. Cut clean specimens, avoiding wrinkles, fingerprints, and damaged edges. Inspect the test surface under consistent lighting before testing.
Check that the rub tester is clean, level, and operating smoothly. Verify the selected load, stroke length, and cycle count against the applicable ASTM D5264 procedure. Secure the specimen without stretching it. Place the rubbing material evenly on the sled, then align the contact area over the printed surface. Start the programmed strokes and watch for slipping, noise, or uneven movement. Stop the test if the specimen shifts.
After testing, compare the rubbed area with an untested reference under the same light. Look for ink transfer, gloss loss, scuffing, color change, or coating removal. Use a rating scale only when it is defined by the project or laboratory method. Take photographs and record every setting, including operator observations. My first mistake was treating cycle count as the only important variable. It was not. Surface texture and drying time changed the result more than expected. Repeat questionable tests, but do not quietly discard inconvenient data. A reliable report should show both the measured result and the limitations of the test.
How to Use an ASTM D5264 Sutherland Rub Tester
Reference test-load configurations commonly used for the ASTM D5264 rub test
ASTM D5264 evaluates the resistance of printed or coated surfaces to dry rubbing. Prepare and condition the specimens, mount the printed face against the standard rubbing material, select the specified load, run the required number of cycles, and compare the resulting scuffing, ink transfer, or loss of coating. The chart shows the commonly used 2 lb and 4 lb test loads, converted to approximate force values using 1 lb-force = 4.448 N. The exact load and cycle count should be defined by the applicable product specification or test method.
Evaluating Results and Maintaining the Equipment
An ASTM D5264 Sutherland Rub Tester turns surface durability into measurable evidence. Before testing, condition printed samples at 23 ± 2°C and 50 ± 5% relative humidity, as ASTM D5264 recommends. Record substrate, ink system, coating, drying time, load, and stroke count. Small differences matter. A 2024 Smithers packaging analysis identifies shorter print runs and more variable designs as growing quality challenges. Consistent rub testing helps separate process variation from genuine material weakness.
Evaluate both the sample and the transferred material. Use a fixed visual scale, preferably supported by color or gloss measurements. Photograph the rubbed area under identical lighting. Compare results with an approved reference, not memory. A slight haze may indicate abrasion, while visible ink transfer suggests poor curing or weak adhesion. Do not judge too quickly. In my experience, handling marks can look like test failure. That is easy to miss.
Maintenance protects the credibility of every result. Clean the platen and rubbing surface after each test, using a lint-free cloth and an approved mild cleaner. Inspect the stroke mechanism, fasteners, counter, and load assembly weekly. Verify the travel distance and speed during scheduled checks. ASTM International’s quality guidance emphasizes documented calibration and traceability for reliable measurements. Keep a service log with dates, findings, and corrective actions. A worn rubbing surface can produce unusually harsh or unusually gentle results. Replace it when texture changes, even if the tester still operates. I would also review the method annually; procedures can become habits, and habits are not always evidence.
 English
 Česká republika
 Deutsch
 Dutch
 Polska